The Interval Ramping Timelapse mode allows you to take time-lapse photos with linearly changing intervals. In regular time-lapse modes, all shots have the same interval between each shot. In most cases this is sufficient, but sometimes you may need to change the intervals to get more interesting effects. Interval Ramping Timelapse mode takes care of that. It has 6 parameters.
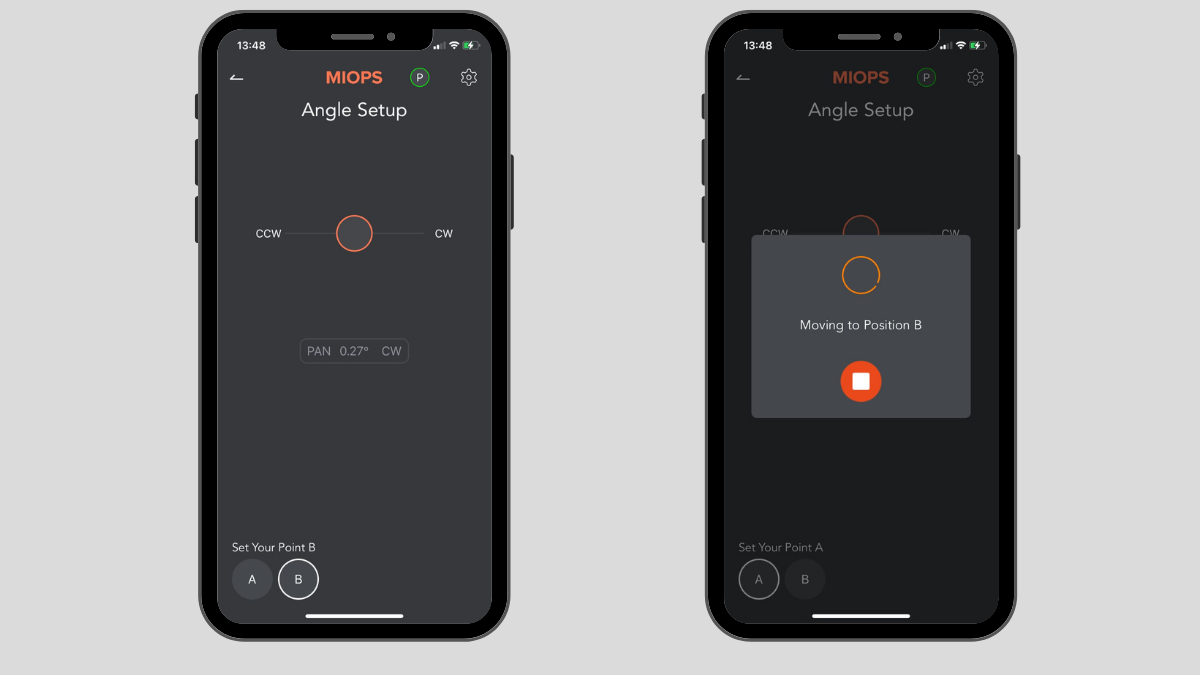
Movement: This parameter defines how much the device should rotate. Clicking the rectangular box on the screen opens the Angle Setup screen. The point A defines the starting position and the point B defines ending position of the movement. You can select the points by clicking the circle buttons on the bottom and change the position by using the slider on the top. Once the position is changed, an orange button will appear to save the new position.
CCW : Counterclockwise (Slide in this direction and your Capsule will rotate counterclockwise)
CW : Clockwise (Slide in this direction and your Capsule will rotate clockwise)
CW : Clockwise (Slide in this direction and your Capsule will rotate clockwise)
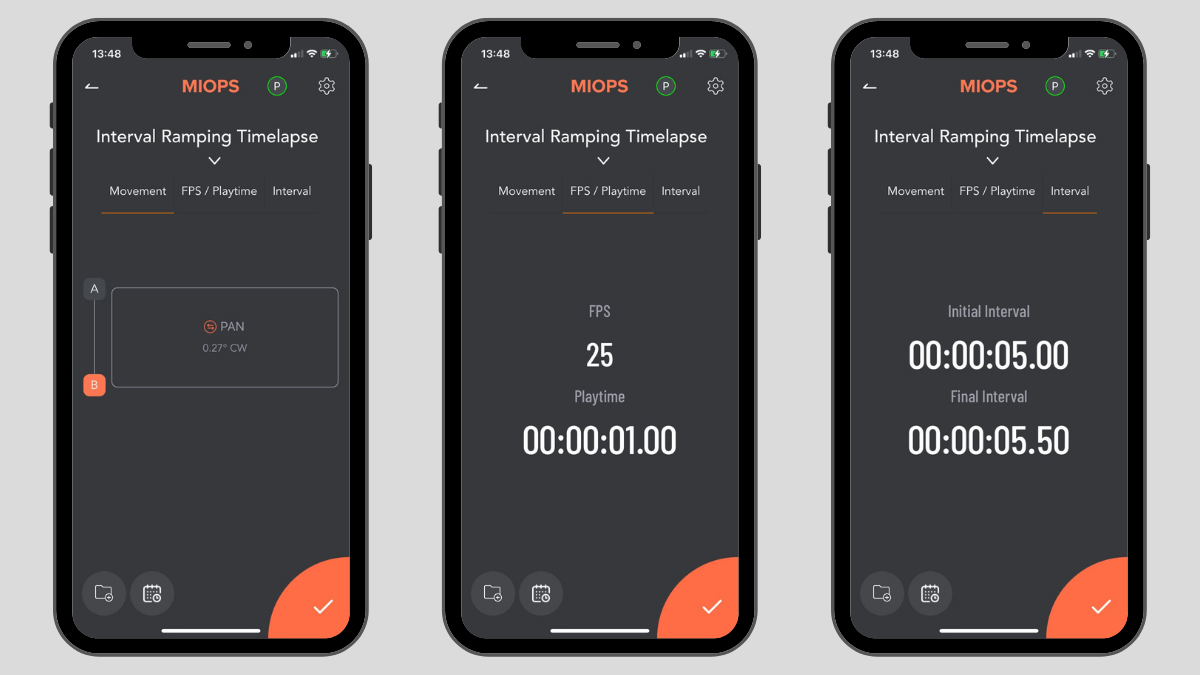
Frames Per Second (FPS) : This parameter defines the amount of individual video frames that your final video will have, per second. For a standard video, you can set this value to 24 or 30.
Play Time : This parameter defines the duration of the final video you want to create.
Initial Interval: This parameter defines the interval between the first 2 shots. The Interval may have a value from 13 milliseconds up to 100 hours.
Final Interval: This parameter defines the interval between the last 2 shots. The Interval may have a value from 13 milliseconds up to 100 hours.
Final Interval: This parameter defines the interval between the last 2 shots. The Interval may have a value from 13 milliseconds up to 100 hours.
How does it work?
Once you set all the parameters, click the Start button on the lower right corner. A status screen will open and your camera will start moving. You can see all the progress in the status screen. The status screen shows the interval and the exposure progress for each shot, the total movement progress, the elapsed time and the remaining time, In addition, the total number of photos taken is displayed instantly in the lower left corner.
Tip #1: The Interval Ramping Timelapse mode does not offer any control over the shutter speed. The shutter speed set on your camera will apply.
Tip #2: If the shutter speed set on your camera is greater than the initial interval or final interval value, the timelapse process will not function properly. The shutter speed of your camera must be less than the interval value. Also, enough duration must be added to allow the camera to save the photo on the memory card. Otherwise, the number of photos taken will be less than shown on the screen.